Wednesday, January 9, 2013

GERMAN CHOCOLATE WHOOPIE PIES


Greetings, dear Reader. Hope you're back in the swing of things and recovering from the holidays! I know you probably just ate sweets for like a whole month, and I know January is supposed to be the month for detox and salads, and I know you're going to exercise more often (but for real this year). But please. Indulge my sweet tooth.

Yes, German chocolate cake in whoopie pie form.


Dark chocolate cake-y cookies.
Bittersweet chocolate ganache.
Ooey gooey coconut-y filling (German chocolate cake frosting, basically).

This recipe is from the Pampered Chef Chocolate cookbook. I followed it exactly, but see my notes below.


My notes: the first time I made this recipe, it was a total disaster. I was planning to take them to a party, and I just did not have my ducks in a row. Leave it to me to try a NEW recipe at the LAST minute on my way to a party. Anyway, when you do them right, the recipe's worth sharing.

The biggest problem was letting the filling set up. The recipe says to refrigerate one hour, but after an hour, mine was still super runny and tried to escape every time I managed to get some on a cookie. It was a big sticky mess. This filling can certainly be made ahead and refrigerated overnight, so that's what I'd do if you're worried about setting up. It's worth it.

GERMAN  CHOCOLATE WHOOPIE PIES 

yields about 32 pies


Cookies
2 cups all-purpose flour
5 tbsp dark unsweetened cocoa powder blend (I used Hershey's Special Dark)
1 1/4 tsp baking powder
1 tsp baking soda
1/2 cup butter, softened
1 cup sugar
2 egg yolks
1/2 tbsp double-strength vanilla
1 cup milk

Filling
1 cup sugar
1/4 tsp salt
3/4 cup evaporated milk
2 egg yolks
3/4 tsp double-strength vanilla
3/4 cup butter, cut into pieces
2 cups toasted sweetened flaked coconut

Ganache
1 cup bittersweet chocolate chips
1/2 cup heavy whipping cream

DIRECTIONS
Preheat oven to 375°F. Line Cookie Sheet with Parchment Paper. In medium bowl, combine flour, cocoa powder, baking powder and baking soda in mixing bowl. In large bowl, combine butter, sugar, egg yolks and vanilla; beat on medium-high speed of electric mixer until well blended. On low speed, add flour mixture in three additions, alternating with milk in two additions; mix well.

Spoon batter onto prepared cookie sheet, 2 in. apart; bake 7-9 minutes or until cookies spring back when lightly pressed. Cool completely on cooling rack.

For filling, combine sugar and salt in medium saucepan. Gradually whisk in evaporated milk, egg yolks and vanilla. Add butter; cook over medium heat, stirring constantly, 8-10 minutes or until temperature reaches 160°F. Transfer to a bowl. Add coconut and pecans; mix well. Refrigerate 1 hour or until cool.

Meanwhile, prepare ganache. Heat the chips and cream together until mostly melted, stirring regularly (you can do this in the microwave, in a saucepan, or in a bowl over boiling water - just go slowly so you don't burn the chocolate). Cool about 15 minutes, or until spreadable.

To assemble, turn cookies bottom side up. Scoop filling onto half of the cookies, pressing down slightly so filling spreads almost to the edge. Spoon about 1 tsp. ganache on remaining half of cookies. Place one filled cookie on top of ganache, pressing slightly.


Tuesday, January 8, 2013

DIY STRING-AND-NAIL PLAQUE (ILLINOIS)


Hello, dear Reader! Have you seen these state plaques floating around the web? I remember first seeing them on Etsy and deciding I needed to make one someday. Now that I'm living so far from my family and beloved home state, it seems like the perfect time to display a little homage to my dear Illinois.

By the way, my dear fellow Californians, the 'S' at the end of "Illinois" is silent. As in "Iroquois." Illinois and Iroquois are French-derived names of Native American peoples/their Algonquian languages. Just as in French, you would pronounce the 'S' if it were followed by an 'E' - as in "turquoise." Or as in the Sufjan Stevens' album, Come on! Feel the Illinoise! :)

Sorry... I like words...

Anyway, this plaque was a ton of fun.
And a piece of cake.
And you don't have to do it all at once.
And it looks just darling.


My husband and I are actually from the same hometown (that's the spot the strings come back to, of course), and the Midwest is a big part of both of our lives. Having the plaque right over the couch is a nice way for us to keep "home" near us :)

Here's what I used:
  • wood plaque from Michael's
  • acrylic paint
  • outline of your shape printed/drawn on plain computer paper
  • finishing nails
  • crochet thread
Paint the board (if you're going to) and let it dry. Situate the paper with your outline where you want it to be, and tape the corners down with some scotch tape.

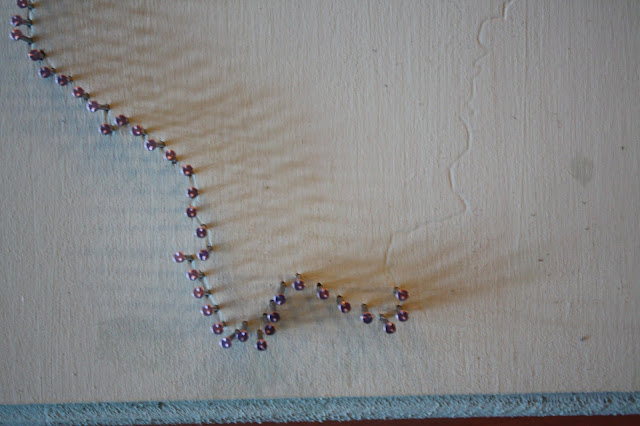
Use a pencil to trace the shape the nails will make. Press hard enough that you make a slight indention of the outline on the wood (the paper may rip a bit in places). Check the board occasionally to be sure you're applying the right amount of pressure. You can see it below:


Once you have the outline, nail away! Be sure to make the center group of nails large enough that those nails will be able to hold the weight of all the string. I did NOT do that correctly... you can tell in the picture that some of the center nails are being pulled because there's too much weight on them. I'll fix that some day... maybe... :)


For each start of string, I tied two tight knots around the starting nail. I only restarted the string when I had loops that didn't return to the center circle (e.g. the bottom left sections), when I you have no choice but to start the string over.


Simple as that! Hope you're enjoying your January, dear Reader. Happy crafting :)


UA-46365231-1