Monday, February 18, 2013

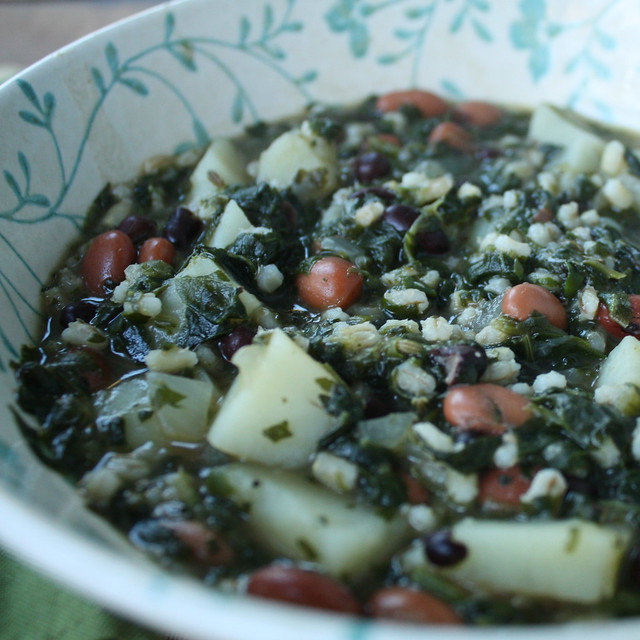
TWO-BEAN SPINACH SOUP


Two words: Comfort food. I don't know about you, but my comfort foods don't tend to make the good-for-you list. Among not-so-good-for-you Italian and Mexican foods, this soup stands out as an exception to the rule. It's not heavy, but it sure is hearty. Plus, it can easily be vegetarian. And it's delicious and warming, just like comfort food should be.

This recipe came about mostly by accident. You know those recipe clippings we've all got tucked away in the back of our cookbooks with intentions to try them some day (even though they've been in there a while...)? Well I've had one for spinach and white bean soup, and it made its way onto my meal plan this week. Then as I started out to make it, I ended up ditching the recipe clipping and making the soup my own. I was so happy with the way it turned out!


My ingredient of the month is going to be barley, I can tell. I cooked it for the first time this week. Yes, the first time ever! We just never ate it when I was growing up, so I never really cooked with it. Now I love it. It's going in everything.

Two-Bean Spinach Soup 

1 medium yellow onion, diced
3 cloves garlic, minced
olive oil for sautéing
32 oz. vegetable stock OR chicken broth
16 oz. bag frozen spinach
1 can pinto beans, mostly drained (not rinsed)
1 can black beans, mostly drained (not rinsed)
5 - 6 small potatoes, peeled and cubed
3 cups cooked pearled barley
salt and pepper, to taste
1 tb. dried fennel seeds
2 tb. Italian seasoning
1 tsp. cayenne pepper

In a stock pot, heat olive oil over medium heat. Sauté onion and garlic until tender. Add stock (or broth), spinach, beans, and potatoes. Bring to boiling, then reduce heat and simmer until potatoes are just tender. Stir in barley and season to taste. Simmer about 10 more minutes.

Voila!


Wednesday, January 9, 2013

GERMAN CHOCOLATE WHOOPIE PIES


Greetings, dear Reader. Hope you're back in the swing of things and recovering from the holidays! I know you probably just ate sweets for like a whole month, and I know January is supposed to be the month for detox and salads, and I know you're going to exercise more often (but for real this year). But please. Indulge my sweet tooth.

Yes, German chocolate cake in whoopie pie form.


Dark chocolate cake-y cookies.
Bittersweet chocolate ganache.
Ooey gooey coconut-y filling (German chocolate cake frosting, basically).

This recipe is from the Pampered Chef Chocolate cookbook. I followed it exactly, but see my notes below.


My notes: the first time I made this recipe, it was a total disaster. I was planning to take them to a party, and I just did not have my ducks in a row. Leave it to me to try a NEW recipe at the LAST minute on my way to a party. Anyway, when you do them right, the recipe's worth sharing.

The biggest problem was letting the filling set up. The recipe says to refrigerate one hour, but after an hour, mine was still super runny and tried to escape every time I managed to get some on a cookie. It was a big sticky mess. This filling can certainly be made ahead and refrigerated overnight, so that's what I'd do if you're worried about setting up. It's worth it.

GERMAN  CHOCOLATE WHOOPIE PIES 

yields about 32 pies


Cookies
2 cups all-purpose flour
5 tbsp dark unsweetened cocoa powder blend (I used Hershey's Special Dark)
1 1/4 tsp baking powder
1 tsp baking soda
1/2 cup butter, softened
1 cup sugar
2 egg yolks
1/2 tbsp double-strength vanilla
1 cup milk

Filling
1 cup sugar
1/4 tsp salt
3/4 cup evaporated milk
2 egg yolks
3/4 tsp double-strength vanilla
3/4 cup butter, cut into pieces
2 cups toasted sweetened flaked coconut

Ganache
1 cup bittersweet chocolate chips
1/2 cup heavy whipping cream

DIRECTIONS
Preheat oven to 375°F. Line Cookie Sheet with Parchment Paper. In medium bowl, combine flour, cocoa powder, baking powder and baking soda in mixing bowl. In large bowl, combine butter, sugar, egg yolks and vanilla; beat on medium-high speed of electric mixer until well blended. On low speed, add flour mixture in three additions, alternating with milk in two additions; mix well.

Spoon batter onto prepared cookie sheet, 2 in. apart; bake 7-9 minutes or until cookies spring back when lightly pressed. Cool completely on cooling rack.

For filling, combine sugar and salt in medium saucepan. Gradually whisk in evaporated milk, egg yolks and vanilla. Add butter; cook over medium heat, stirring constantly, 8-10 minutes or until temperature reaches 160°F. Transfer to a bowl. Add coconut and pecans; mix well. Refrigerate 1 hour or until cool.

Meanwhile, prepare ganache. Heat the chips and cream together until mostly melted, stirring regularly (you can do this in the microwave, in a saucepan, or in a bowl over boiling water - just go slowly so you don't burn the chocolate). Cool about 15 minutes, or until spreadable.

To assemble, turn cookies bottom side up. Scoop filling onto half of the cookies, pressing down slightly so filling spreads almost to the edge. Spoon about 1 tsp. ganache on remaining half of cookies. Place one filled cookie on top of ganache, pressing slightly.


Tuesday, January 8, 2013

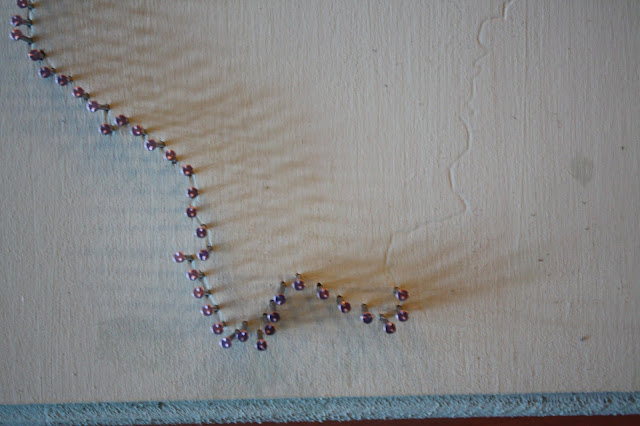
DIY STRING-AND-NAIL PLAQUE (ILLINOIS)


Hello, dear Reader! Have you seen these state plaques floating around the web? I remember first seeing them on Etsy and deciding I needed to make one someday. Now that I'm living so far from my family and beloved home state, it seems like the perfect time to display a little homage to my dear Illinois.

By the way, my dear fellow Californians, the 'S' at the end of "Illinois" is silent. As in "Iroquois." Illinois and Iroquois are French-derived names of Native American peoples/their Algonquian languages. Just as in French, you would pronounce the 'S' if it were followed by an 'E' - as in "turquoise." Or as in the Sufjan Stevens' album, Come on! Feel the Illinoise! :)

Sorry... I like words...

Anyway, this plaque was a ton of fun.
And a piece of cake.
And you don't have to do it all at once.
And it looks just darling.


My husband and I are actually from the same hometown (that's the spot the strings come back to, of course), and the Midwest is a big part of both of our lives. Having the plaque right over the couch is a nice way for us to keep "home" near us :)

Here's what I used:
  • wood plaque from Michael's
  • acrylic paint
  • outline of your shape printed/drawn on plain computer paper
  • finishing nails
  • crochet thread
Paint the board (if you're going to) and let it dry. Situate the paper with your outline where you want it to be, and tape the corners down with some scotch tape.

Use a pencil to trace the shape the nails will make. Press hard enough that you make a slight indention of the outline on the wood (the paper may rip a bit in places). Check the board occasionally to be sure you're applying the right amount of pressure. You can see it below:


Once you have the outline, nail away! Be sure to make the center group of nails large enough that those nails will be able to hold the weight of all the string. I did NOT do that correctly... you can tell in the picture that some of the center nails are being pulled because there's too much weight on them. I'll fix that some day... maybe... :)


For each start of string, I tied two tight knots around the starting nail. I only restarted the string when I had loops that didn't return to the center circle (e.g. the bottom left sections), when I you have no choice but to start the string over.


Simple as that! Hope you're enjoying your January, dear Reader. Happy crafting :)


Sunday, December 2, 2012

THE DECEMBER LIST: 21 THINGS TO DO BEFORE THE YEAR ENDS

Happy December, dear Reader! This year, I'm savoring every moment of Decemberiness.

See, for the last several years, I've been a student. December to a student means setting off the ticking clock down to final projects, exams, and all the loose ends you put off throughout the semester. You and everyone around you work like a busy bee (and if you're a performer like me, you have Christmas performances on top of it), and then you crash hard. And suddenly Christmas has come and gone. Or at least, that's how I always felt...

So like I said, this year, I'm savoring every moment of Decemberiness :)

To help me do that, I put together a little list of personal musts. Little things to do, see, cherish, and enjoy, all before the holiday season comes and goes - as it usually does - in the blink of an eye.

I'll probably post about some of these as I cross them off, and stay tuned for more December inspiration!


1. Hot toddies + Christmas music + put up Christmas decorations
This one's a given. Isn't it almost impossible NOT to play some Christmas tunes while you decorate? And with all this northern California rain we've been getting, nothing cozies me up like a hot toddy. My recipe = hot water + Jack Daniels Honey.

2. Make snowflakes out of paper or fabric.
You gotta do it at least once this year, right?

3. Collect pine cones or leaves and make garland. 
Need some cheap/free Christmas decor? Bring nature inside. When I lived in Illinois, I saw one size of pine cone. Ever. Now that I'm in norcal, I've got the biggest, the smallest, and in betweeners. It's perfect for creating natural decor.

4. Make salt dough ornaments or any kind of DIY ornaments.
Salt dough, cornstarch clay, gingerbread... and basically anything you can bake into pretty shapes and hang on your tree. I think I put this one on the list because I've never done it before. (And, again, it's cheap.) Here's a salt dough recipe from Katy Elliott.

5. See an old Christmas movie at an old theater.
Old movie theaters are the best. Especially the ones with a stage, a curtain, and live music - with an organist who performs before the movie begins and is lowered down into the stage as the opening credits begin to roll on a real projector. Lots of them play Christmas classics in December - like It's a Wonderful Life or White Christmas. Combined with the snow falling and Christmas lights everywhere, it's such a nostalgic and heart-warming experience.

6. Take family pictures.
Just making a point to get a good picture, especially now that my family is all spread out and seldom comes together all at once.

7. Play in the snow. 
If you don't get snow, I'm sorry. If you do, c'mon. There's no excuse not to go sledding, build a snowman, have a snowball fight, or at least make some snow angels.

8. Cocktail Party with friends.
Fancy attire? Yes. But also very laid-back. That's my plan. Pretty dresses, hip suits, winter-y cocktails, Christmas music, maybe some dancing, and catching up with friends. Sounds perfect.

9. Go caroling. 
Every year.

10. Call relatives and sing carols over the phone. 
My family is super spread out, so I don't know why I never though of doing this before. I hope I get myself to do it this year! How sweet would that be?

11. Send postcards to cousins. 
I'm not planning on sending a lot of Christmas cards this year, but I still want to drop a line to some family members and old friends I don't see often. A postcard sounds perfect. Once Christmas cards start coming in from every direction, I'd love to find a random postcard in the mix from my cousin.

12. Girls' night with Mom or sisters, or aunts, etc.
Cozy up for some Mom time with nail polish and a Christmas movie.

13. Walk around the town square in the evening and drink hot chocolate.
I can't wait for this one. My hometown is small, with a charming little square at the center which is lit up prettily for Christmas, including decked out shop windows and Christmas music playing over speakers night and day. Most of the shops still close at 5:00, so in the evenings it's quiet, (except for the music). It makes for a lovely evening stroll - and opportunity to dance to Christmas music in the street. :)

14. Star gaze out in the country on the longest night of the year, Dec. 21.
For me, this one is also going to include cigar smoking. Probably. :)

15. Sleepover around the Christmas tree and read Christmas stories and books.

16. Read 'Polar Express' or other favorites with family

17. Kiss under mistletoe. 

18. Watch a classic Christmas movie in pajamas with blankets and popcorn and snuggling.

19. Do Advent devotions.

20. Do things in candlelight. 
Like baths, meals, bedtime stories. movies.

21. Make thoughtful resolutions for the New Year. 
Write them down. Save them. Meditate on them.


Thursday, November 29, 2012

CHOCOLATE BOURBON PECAN PIE (with cinnamon whipped cream)


This year I spent my first Thanksgiving without my family. Ever. (Well, okay, my husband was with me. He counts as family. But you know what I mean - all the rest of my family.) It was also my first Thanksgiving with 65-degree weather and green grass outside. Not what I'm used to.

We spent Thanksgiving with my husband's coworkers, and my only job for the day was to make the desserts. Naturally I chose desserts that reminded me of my family: pecan pie and apple pie. However, in keeping with all the ch-ch-ch-changes that have been happening, I took the leap to put a little spin on both.

My pecan pie took a Southern turn with chocolate and bourbon - this one's from Paula Deen, y'all.


As for the apple pie, I chose instead to make pretty pastry braids with pie dough, and I fashioned them around apple-pear pie filling. (In full disclosure, that was mostly because I only own one pie pan. But I was also inspired by this braid at Eat.Live.Run., and by all of the commenters asking the same question I was so curious about: would it work with a dough that doesn't rise? Like, say, pie dough? As it turns out, it does. You just have to be strategic when braiding and keep a close eye on it as it bakes.)

About the leaves. I've had this image of golden leaves of pastry atop buttery pecans ever since I decided to make the pecan pie. I'm so in love with fall leaves. I can hardly stand to walk by fallen leaves without picking up fifty of them. Pecan pies are beautiful, too, in that same warm-brown-colorful-golden-buttery-fall kind of way. Mmm. Anyway, I couldn't find a tiny leaf cookie cutter that wasn't way out of my budget (or didn't have a super expensive shipping cost). Soooo, crazy as I am, I ended up cutting out all of those leaves by hand with a paring knife. Don't judge! It didn't take that much time... And, actually, I had a lot of fun doing it :)


Happy week-after-Thanksgiving, y'all!

Chocolate Bourbon Pecan Pie

(Adapted slightly from Paula Deen's recipe)

INGREDIENTS
9" pie crust (2) - my recipe is below, or use your own
1 cups pecan halves, chopped/halved/quartered (you can leave them whole)
3 large eggs, beaten
3 tablespoons butter, melted
1/2 cup dark corn syrup
1/2 cup sugar
1/2 cup brown sugar
2 - 3 tablespoons good-quality bourbon
1/3 cup semisweet chocolate chips
1 egg beaten with a little water, for egg wash
sugar for sprinkling

DIRECTIONS
Preheat the oven to 375 degrees F.

Place pie crust in bottom of 9-in. pie pan. Use other pie crust to cut out leaves at this point, if you wish to do so. Cover bottom of crust with pecans. Sprinkle with chocolate chips.

In a medium bowl, whisk together the eggs and melted butter. Add the corn syrup, sugars, and bourbon. Stir until all ingredients are combined. Pour mixture into the pie shell over the pecans. Let the pecans rise to the top, then arrange any pie dough cut-outs you have. Brush the edge of the pie and the cut-outs with egg wash, and sprinkle with sugar.

Place pie on a heavy-duty cookie sheet. Bake for 10 minutes. Lower the oven temperature to 350 degrees and continue to bake for an additional hour or until pie is set. Check the pie every so often by removing it from the oven and "shaking" it. When it no longer jiggles, it's done! Cool on a wire rack.

Note: You'll probably need a pie shield to protect the edges and cut-outs from burning. I made one out of aluminum foil and placed it on the pie after about 30 minutes.

You can make it the day before and refrigerate overnight. I ended up serving it warm, but I think it might have been better at room temperature.

Changes from the original recipe: Basically, I used less pecans, a little extra bourbon, and I replaced half of the white sugar with brown sugar. I also adjusted the baking time A LOT. Nearly every reviewer for the original recipe complained that they had to bake it 30 - 60 min. longer, and they were all right!

Cinnamon Whipped Cream

Makes about 4 cups.
What could be better than cold, freshly whipped cream? That is, besides adding a little cinnamon and pairing it with chocolate bourbon pecan pie? 

2 cups heavy cream, cold
3/4 cup powdered sugar
1 tsp. cinnamon
1 tsp. vanilla

The key to fresh whipped cream is that all of your ingredients and utensils are cold. Freeze your bowl and beaters for 30 minutes before hand (or refrigerate if you have to). A glass or metal bowl works best.

Add the ingredients to the bowl and beat with an electric mixer on medium-low, until ingredients are well mixed. Increase the speed and continue to beat for 5 minutes or so, until cream forms soft peaks (they should peak and then bend over, like a candy cane). I like to use the beaters in a sort of upward motion, rather than "stirring" in a circle. It seems to trap more air more efficiently, and the purpose of whipping cream is to trap air, right?


Pie Dough Recipe (from Food Network Kitchens, original recipe here)


INGREDIENTS


2 1/2 cups all-purpose flour
1/4 cup sugar
3/4 teaspoon fine salt
3/4 cup cold unsalted butter (1 1/2 sticks), diced
1 large egg
3 to 4 tablespoons very cold water

DIRECTIONS

Whisk the flour, sugar, and salt together in a medium bowl. Rub 1/4 cup of the butter into the dry ingredients with your fingers until completely absorbed. Then rub in the remaining butter until it resembles cornmeal mixed with pea-size bits of butter. (If it gets warm and sticky, refrigerate it to chill.)

Beat the egg with 3 tablespoons of the water; then drizzle it evenly over the dough. Lightly stir the dough together with a fork. (The dough should just hold together when you squeeze it together, with some dry crumbly bits.) If the dough is really dry, sprinkle it with the final tablespoon of water. (To make the dough in food processor, see below.)

Divide the dough in half and wrap each half in plastic wrap and shape into disks. Refrigerate at least 1 hour or up to 2 days. (The dough can be frozen for 2 months. Defrost dough in the fridge overnight.)

When it's time to assemble the pie, lightly dust the work surface with flour. Roll a disk of dough into an 11 to 12-inch circle. Transfer the dough to 9-inch glass pie pan, and trim the edges neatly (if needed) so it comes just to the top edge of the pan. (You can also fold over extra edges, instead of trimming, and flute the edge if you want.)

Tuesday, November 20, 2012

CHOCOLATE TOFFEE CARAMEL CUPCAKES


Hello, dear Reader! Happy Thanksgiving week! There's been a lot of baking and crafting happening around here, and not nearly enough blogging about it. To make up for it, please enjoy these delish cupcakes I created this weekend for a bake sale. They were inspired by the gorgeous cakes in this post by Naomi over at Bakers Royale.


Moist chocolate cake,
scattered throughout with chunks of toffee
and chunks of chocolate.
(But not too sweet.)
Creamy
caramel
frosting.
Melt-in-your-mouth
chocolate ganache.
Crunchy toffee on top.


See how much I love them?
I just wrote a poem.


They're poetic, I guess. :)


I improvised the caramel buttercream. Pretty simple, I know, but as a girl who's just breaking into the world of diving in without recipes, I was pretty proud :) You should adjust powdered sugar and caramel sauce depending on how sweet and/or caramel-y you want it to be. My chocolate cake isn't too supersweet, so I was able to put the caramel in the sweetness spotlight.

For the regular size cakes, I simply frosted with the caramel buttercream and then drizzled generously with the ganache. For the minis, I dipped each cake in the ganache first for an extra layer of yum. (You can tell in the picture above - regular and mini side-by-side - that the minis are dipped first.) If you dip first, just be sure to let the ganache set up before frosting and drizzling the cakes.

Mmm... I can't believe they're all gone...


Chocolate Toffee Cakes (makes 24 regular + 24 minis)
It's a dense batter. You only need to fill the papers about half full. Mine were probably even a little less than half full.

2 1/2 cups all-purpose flour
2 cups white sugar
1 tsp. baking soda
1/2 tsp. salt
1/2 cup unsweetened cocoa powder
3 - 4 T instant coffee
4 eggs
1 cup butter (2 sticks), melted
1 1/2 tsp. vanilla extract
1 cup strong hot coffee
1/2 cup milk
3/4 cup chocolate covered toffee bits
3/4 cup semi-sweet chocolate chips

In a large bowl, mix flour, sugar, baking soda, salt, cocoa powder, and instant coffee. In a separate bowl, combine eggs, butter, and vanilla. Mix well. Add wet ingredients to dry ingredients and stir just to combine. Pour in milk and hot coffee and mix well. Stir in toffee bits and chocolate chips.

Fill cupcake liners about half full. Bake at 350 for 20-24 minutes, or until toothpick inserted comes out clean. Cool completely before frosting.


Caramel Buttercream
Adjust powdered sugar and caramel sauce to the level of sweetness and caramel-y-ness you're going for.  You can make this in two half-batches if it's easier.

1 cup caramel sauce (Homemade is best! recipe here)
3 sticks butter, softened
1 tsp. salt
2 1/2 cups powdered sugar (adjust to taste)

Beat butter and salt in a stand mixer until fluffy and white, 3 - 4 minutes on medium-high speed. Add powdered sugar and mix until smooth (medium-low speed). Add caramel sauce and mix until smooth, then beat for a couple more minutes on medium-high speed to fluff it up a bit.


Chocolate Ganache
Adapted from Naomi at Bakers Royale. *Note: Original recipe calls for 5 - 8 tablespoons of water, but I think I only ended up using 2. Use your own judgement.

2/3 cups semi-sweet chocolate (original recipe uses dark chocolate)
2 tablespoons heavy cream
4 tablespoons powdered sugar, sifted
2-3 tablespoons warm water*

Heat the chocolate and cream over a pot of simmering water. After a couple of minutes, the chocolate should be soft enough to begin to stir into the cream. Continue to stir until the chocolate melts completely. Remove from heat and stir in powdered sugar. Add water by tablespoon until it reaches pouring consistency.

Here are the ganache-dipped cuties:


HOMEMADE CARAMEL SAUCE

This was my first attempt at caramel sauce. Apparently it's easy peasy!

I thought this recipe turned out the perfect caramel: creamy and not too sweet. Wouldn't it be great to drizzle your Thanksgiving apple pie and ice cream with homemade caramel? Yes. The answer is yes. OR, you can use it to make this creamy caramel buttercream that I used for my chocolate toffee caramel cupcakes this weekend. OR, (*cough), you can pour it into a bowl and eat it. With a spoon.


Basic Caramel Sauce
(based on this one)

1/3 cup water
3/4 cup sugar
2/3 cup heavy cream

Heat water and sugar over low heat and stir until sugar is dissolved. Increase heat to high. Now and then, swirl the pot to keep the mixture moving, but do not stir the mixture directly. It will begin to boil, then it will become a light amber color. Eventually it will become a dark amber color (as in the middle picture). Turn of the heat and whisk in cream. Continue to whisk until mixture is creamy. (It's okay if there are still bubbles. They'll go away when it cools.) Allow mixture to cool away from heat.


UA-46365231-1