Showing posts with label home. Show all posts

Wednesday, February 26, 2014

STAMPED CLOTH NAPKINS (& DIY POTATO STAMPS)


Hi, dear reader!

I'm generally a very floral, flowy, nature kind of person (and our apartment is just like that), but I'm such a sucker for modern, minimalist design and geometric shapes. I have lots of little modern/geo decor ideas collected in the back of my mind, but I've had no way to realize them since our (small) apartment aesthetic is very vintage/rustic. I haven't figured out a way to incorporate the geometric themes I love with the homey, traditional style of our decor.


I was going to stamp up some pretty vintage looking napkins when I realized this was my chance to sneak in some shapes. Napkins!

Perfect.


It was one of those last-minute craft urges - you know, where you have an idea and you HAVE to make it right this very second? But I don't have any stamps. So I pulled out some potatoes, spent about 20 minutes carving, and voila! (Almost) free stamps for my new geometric napkins!


To make potato stamps:
  1. Cut a potato in half (width-wise). 
  2. Insert a cookie cutter about 3/8" into the potato (white part, not skin part), to cut the shape. 
  3. Use a knife and/or your fingers to remove the extra parts, using the cookie cutter cut as a guide.
I used "soft" fabric paint - Washable. Got it at Michael's - some matte and some metallic. 

While stamping, you may get some extra paint around the edges of your shape (squished out when you pressed down on the stamp). Use a Q-tip to dab the extra paint away and smooth out the line. 

After the napkins dried overnight, I washed them in the washing machine, and they came out perfectly well and very soft (not stiff from the paint). 

Happy crafting!

Friday, September 13, 2013

DIY MAIL ORGANIZER & STORAGE BOARD


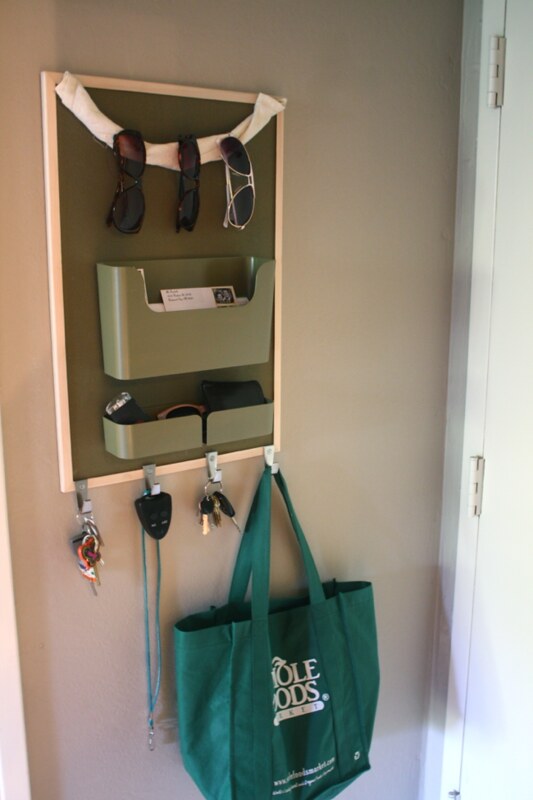
Hello, dear readers. Hope you're doing great! Just a quick little weekend project to share with you: this mail organizer/storage board. It's not too glamorous, I know, but it happens to be pretty hidden in our apartment. And the sage color really is pretty in person, even though it looks kind of gross in my extremely sub-par photos. 

Anyway it's amazingly useful. 

Plus, it was much cheaper than buying something like it. 

(That little black remote is actually our light switch. And now it's actually on the wall by the door! Yep, it's a big step up from sitting on the kitchen counter.)

Now I'm going to tell you the long version of the story because I'm proud of it, and because I'm kind of in love with organization (my life is full of post-its). A few months ago, I eliminated our junk drawer and catch-all spot. My thinking was: if you designate a spot for junk, it's inevitably going to be FILLED with JUNK. But if you don't, then you will either be forced to find a spot for something/throw it away OR the thing will clutter up your space, and you'll eventually clean it up (as opposed to hiding it away where you don't have to deal with it). Believe it or not, it has totally worked. Now our "junk drawer" contains ONLY things we use regularly (and a few miscellaneous occasional-type odds and ends). You can do it, too!

But we still had the regular, everyday-object clutter, which can become so annoying when trying to clean up the apartment. 

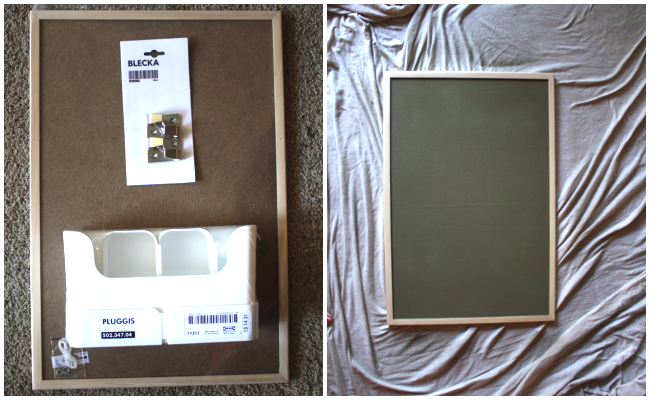
So after a few minutes of Pinterest and Google Images re: organization, I made an early morning trip to Ikea and Home Depot. I came back with this stuff, and some sage spray paint. 


It's now tucked perfectly out of the way behind/by the door. We use it for keys, wallets, mail stuff, bike stuff, shopping stuff (and any other lonely clutter that needs a last-minute home when people are coming over). It's been up for a few weeks now, and we really use it (I more than my husband, admittedly). High five for a successful de-cluttering project! (Those are rare, are they not?)

Happy de-cluttering! Hope you have a WONDERFUL weekend :)


Monday, July 22, 2013

DIY PILLOW COVERS (FROM CLOTH NAPKINS)


Hello, dear reader! Happy Monday! I am officially in a state of limbo, having finished my full-time job last week and ready to begin graduate school in about a month. I graduated from college a year ago in May, planning to take one year off before continuing onto graduate school. Today, as the year is coming to an end, I can confidently say that I'm very happy I took the time off. Besides getting acquainted with a new (and beautiful) part of the country, saving up from a year's worth of working, and having some time to take a breath from school, I have learned a lot about myself.

I'm one of those people who loves school, and I was surprised to discover that I behave pretty differently when I'm not in school (i.e. how I take care of myself, motivate myself, and in general structure my life). After having been in school for as much of my life as I can remember, how could it not be exciting to discover a new layer of myself?

Up until this year, I was kept plenty busy with goals I was trying to attain. They were all so natural, just following a path that had been laid out for me by teachers, parents, institutions, and (at some point) myself. In many ways, it was so easy to for me to get through because goals were so clearly laid out for me. You know: If you want to get an A, you need to do this homework; if you want to get better at piano, here are the ways you should practice. Surely it's not always so simple. But in general, someone was telling me where to be, what time, and how to be prepared for it. That I can do.

This year, my schedule and goals were a blank slate. I chose when and where to be, what to learn, and how to evaluate myself. That... I was not so good at. It involved a lot of sifting through myself to figure out what's important to me and how I can best use my talents to serve the world. And though I learned a lot, I feel like I've just barely scratched the surface.

I know, I sound like an early-twenty-something off to find herself. But that's what I aaaaam! Sigh.

DIY PILLOW COVERS (FROM CLOTH NAPKINS)


SO. In these few weeks off, I'm studying, practicing, and trying to finish up several little projects around the apartment, starting with these pillow covers.

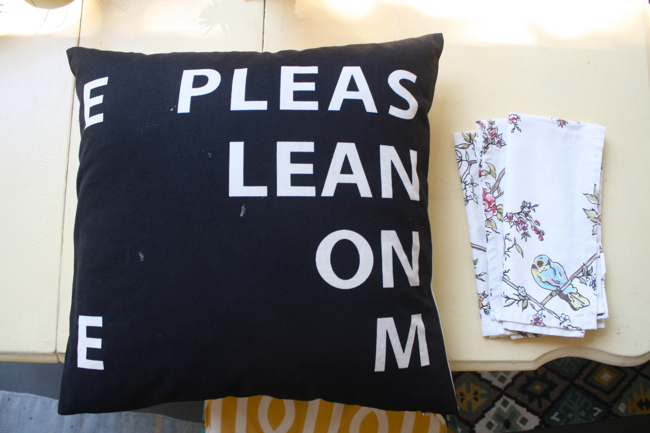
This black and white pillow below (from CB2, a few years ago), was our only couch pillow. It's SO COMFORTABLE, but it's old and dirty (please observe), and it doesn't go with the room. Conveniently, I have these darling napkins which I like so much I wanted to display them. Plus, I've had them for months and never used them because I don't want them to get dirty. Obviously it was time to use them for something else.


I don't have a sewing machine, so I used heat-bond hem tape on 3 sides of the cover, put the pillow inside, then sewed up the final edge by hand.

I'm sure you don't need a photo tutorial, but I want to include it to emphasize how easy this was :)

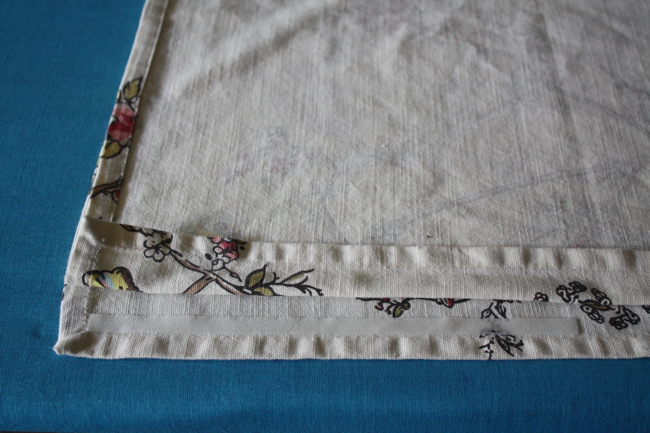
Iron the napkins well. Line them up together, face to face. Lay a piece of hem tape JUST inside the hem of the napkin. If you put the tape directly on the hem, it will have thicker, bumpier fabric to bond and won't be as strong.


Now proceed to the next section.


And continue until you've finished 3 sides of the square. Be sure to fold the corners under evenly so they look neat. It helps to iron them exactly how you want them before adding the tape.

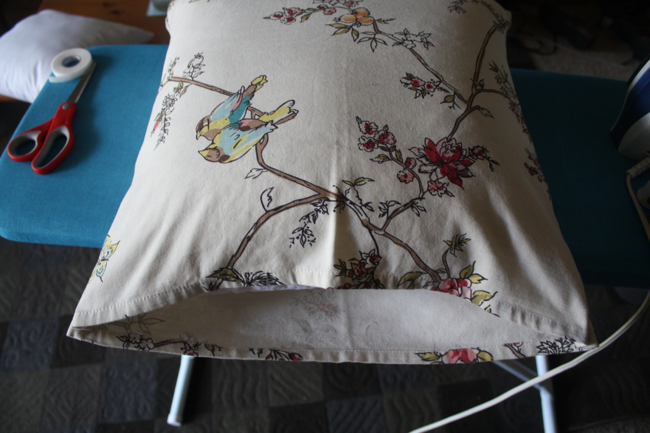
Then turn it right-side-out, and iron well once more.

Slip the pillow inside, and sew up the edge. Voila!


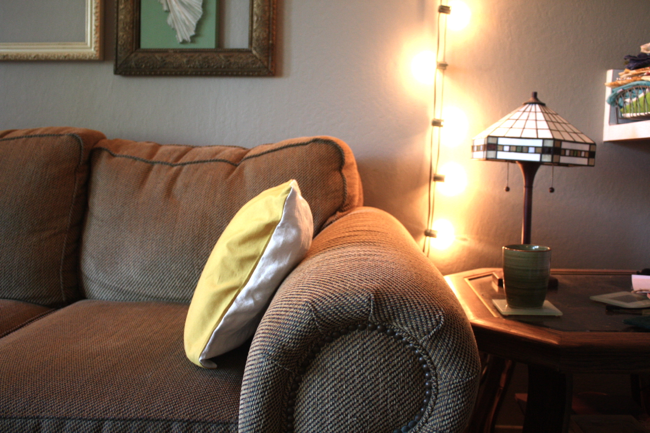
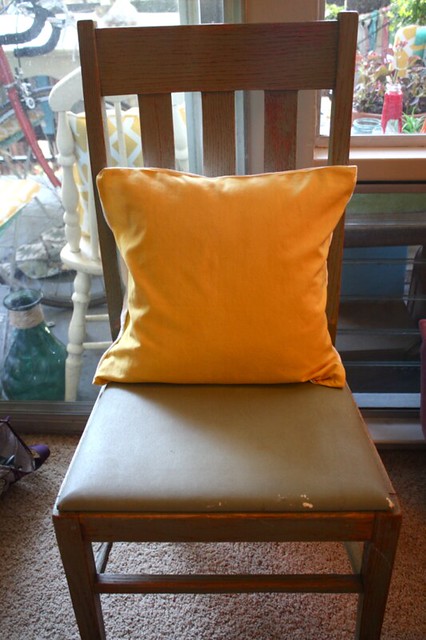
I also made this darling little 2-tone cover the same way - with one yellow and one white napkin. For this one, I actually bought a pillow form from Michael's. These napkins were smaller, so I think it's only 12 x 12. (Better photo above.)


Monday, July 1, 2013

COZY SUMMER BALCONY (IN A RENTED APARTMENT)


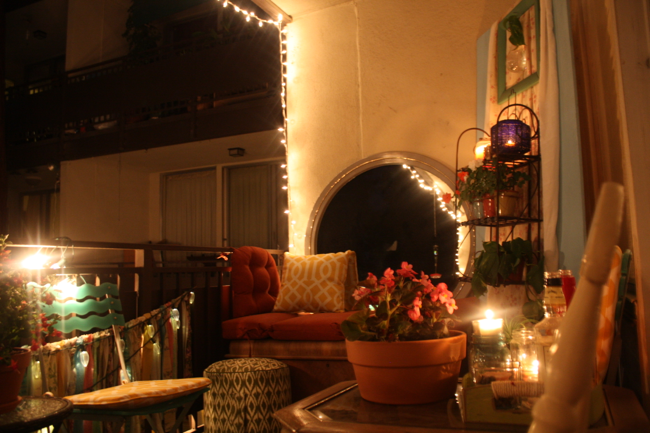
I've been working hard to "summer up" our balcony, and I'm happy to say that we're now enjoying a very lovely space! It's pretty (yay); it's practical (still using it for storage); and it's usable (you can get comfy out there - day or night; alone or with friends; reading, eating, sleeping, whatever). I'm really excited about the space, and I'm excited to share it with you! And to share ideas and tips for your own balcony/patio, so you can get out there on... those su-um-mer ni-hights.


Something's pretty enchanting about being with friends on warm-weather nights, especially if you've got twinkle lights and booze. When I lived in Illinois, I spent my summers at home (my mom's house), where I was absolutely spoiled by ideal settings for those enchanting kinds of summer nights: a beautiful patio, a fire pit, a big open pasture (we used to have horses). And we lived in the country so, of course, stars. Always stars.


Now my little SF bay area apartment definitely doesn't have a big open field or a fire pit, but we're so lucky to have a sizable balcony with plenty of trees to look at and lots of twinkle lights leftover from our wedding. Actually I may have gone a little overboard in the twinkle lights department... I think we're probably the Griswolds of our building. (But I love it. I love twinkle lights outdoors. A lot.)

Despite those advantages, there were some minor obstacles:
  • narrow space
  • small budget
  • renting, so can't put holes in the walls
  • don't have a green thumb, direct sunlight, or much time to spend caring for plants
  • still needed to use some space for storage (bikes, garden stuff, outdoor things etc.)

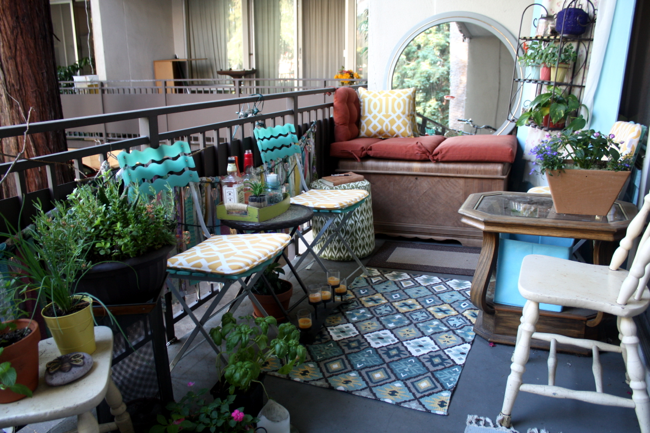
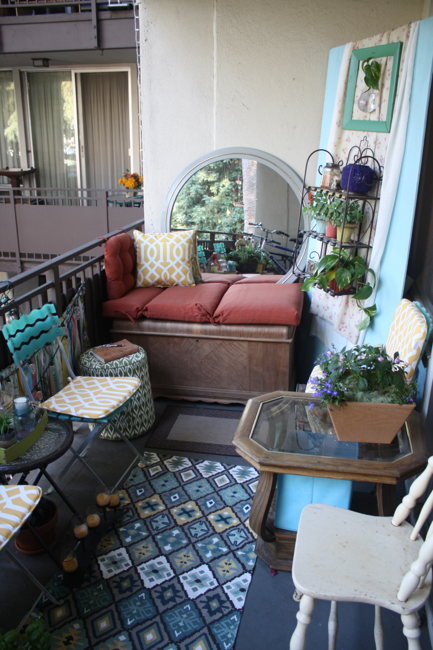
I DEALT WITH THE NARROW SPACE  by arranging the seating as circularly as possible, while offsetting the chairs so that no one is sitting directly across from someone else.

I also used a big mirror at one end of the patio to make the space seem bigger. The mirror is from an old dresser set, and simply leans agains the wall (so I didn't have to put holes in the wall).


Another must for small spaces is versatile furniture, e.g. chairs that can fold up and be moved, benches or footstools that have storage space inside, side tables with drawers. One of my favorite pieces of the balcony is this ottoman (from Target), which we use also as a pillow and a table.


AS FOR A SMALL BUDGET, I tried to work with what we had and buy as little as possible. I thrifted and made things by hand (check out my Pinterest for more inspiration). The biggest investment we made was in seat cushions, which was very much worth it (Bed, Bath, & Beyond). Besides making the space more comfortable, they of course add color and patterns. Mix and match. Not all seats have to have cushions. Another quick way to make the patio cozier is to add a rug. (Our balcony floor seems to be kind of yucky, no matter how much we clean it, so a rug made a huge difference for us. Try TJMaxx and HomeGoods for nice, inexpensive rugs.) Plus, a rug in the middle of a seating area gives the seating a central focus point and helps tie the area together.

Definitely check out thrift stores and flea markets for these things:
patio chairs and side tables
mirrors
lanterns, candle holders, other decor
flower pots and planters, plant stands
sheets/curtains/fabrics for making fabric garlands, outdoor curtains, or slipcovers

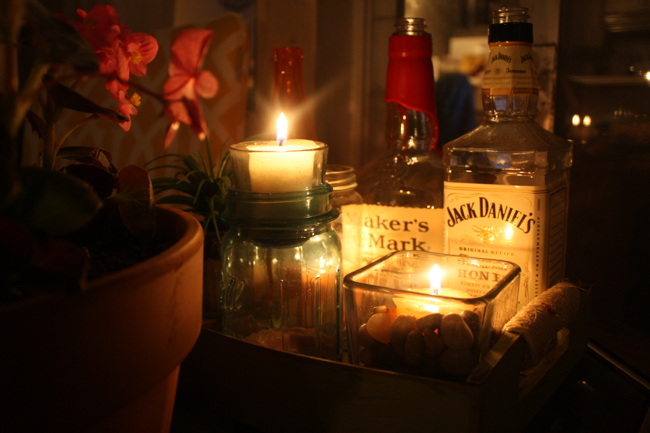
I also hit up the Dollar Store, just in case something jumped out at me. You never know what you'll find! I got these square glass candle holders and vase-filler pebbles to use as candle holders (see below).


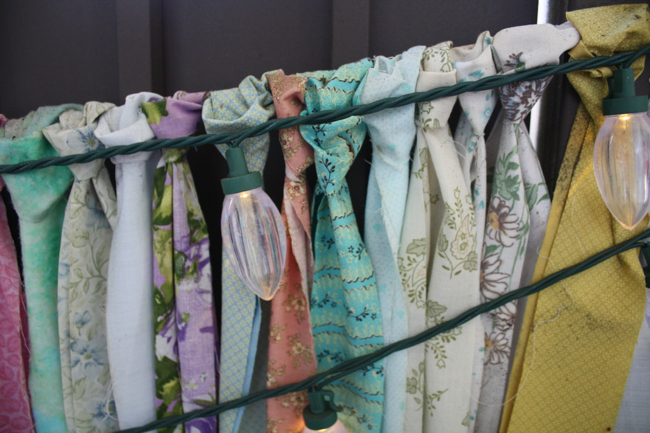
This fabric garland is made from strips of thrifted sheets, and it does a nice job covering the not-so-pretty metal railing. Of course it looks darling with large LED twinkle lights, too :)


OKAY, ON NOT PUTTING HOLES IN THE WALLS: I already mentioned the large mirror at one end of the patio, which has long legs attached to the back so it can lean against the wall and doesn't need to be hung. I also have this huge piece of plywood (8' x 3'), painted blue. (It used to have a mirror on it but I've now recycled it to something new.) I leaned that in the corner to use as a little patch of removable wall that CAN have holes in it. I hung fabric over the top as a kind of a "background," to make it feel a little more cozy. You can do this on the real wall, too: hanging fabric or a curtain directly on a wall requires minimal holes if you use small hooks and a wire. If you're worried about weather-proofing, try a shower curtain. 

Also, consider putting some holes in the ceiling. I know that's cheating a bit, but you can find tiny hooks (for lanterns, lights, etc.) that would only put a small hole in the ceiling. Plus, hanging from the ceiling adds depth. And after a couple of lanterns are up, you might not need anything on the wall at all. 


This little hanging starter vase came from CB2. Isn't it darling? The frame and fabrics were thrifted. 


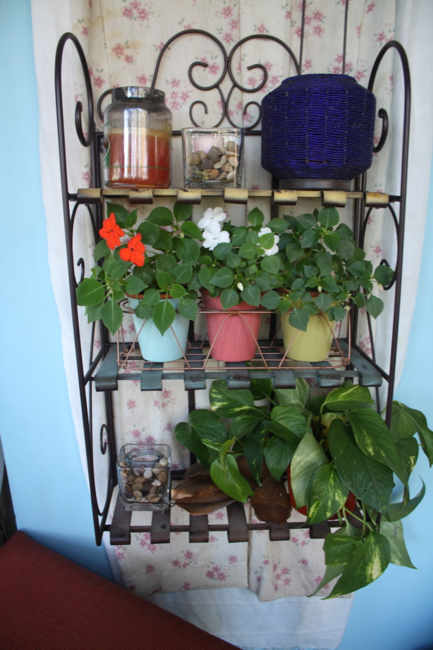
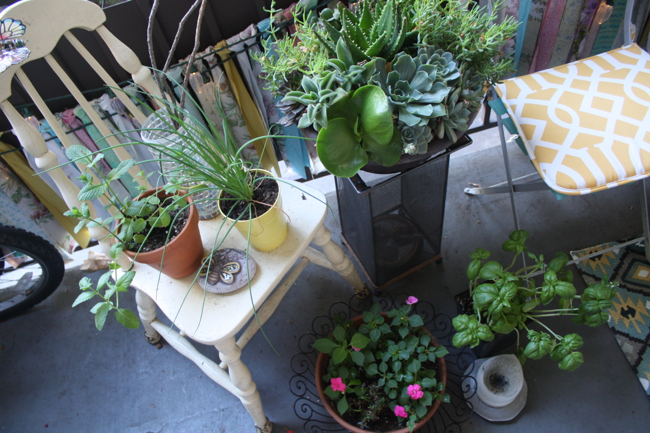
NOW, ABOUT PLANTS. Many of you may be blessed with a plenty of sunlight on your balcony, or even a green thumb, and I'm so happy for you! But plants are not my thing (though I'm trying!). If you're like me, with limited space, not too much time to spend caring for plants, and a mostly shaded balcony, don't fret. You have plenty of options! (I'll write a more detailed post for you soon with tips for balcony gardens :) ) For now, I'll say two things: succulents and herbs. Succulents are low maintenance, drought-tolerant, and really don't need full sun (though they like it). Many herbs will do well with part sun/part shade. Try using some rail planters to maximize sunlight and minimize the space they take up. (Make your own rail planters by drilling holes in plastic pots and attaching them with zip ties.)


USING THE SPACE FOR STORAGE works mostly because we have sectioned off the patio into two areas: seating and storage. We kept the small area to one side of the door for storage only (bikes, garden things, etc.), and the larger area on the other side of the door is for seating only. With our particular layout, the placement of the door helps section off the space, but some other ways to create sections are: keep walking space between the sections, use rugs to indicate sections, or arrange furniture in a way that clearly excludes the storage section.

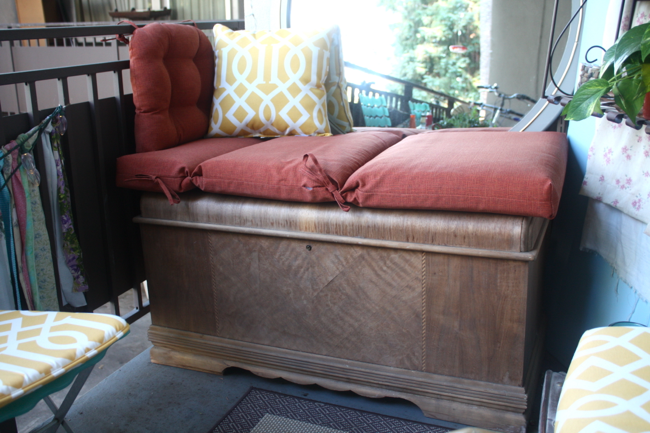
In addition to creating sections, we have furniture that doubles as storage space. My favorite is my "bench," made from seat cushions and a wooden chest. I know, the cushions look kind of funny like that. But, hey, the patio already has a somewhat eclectic, thrown-together feel, right? :) And since the cushions are so comfy, it doesn't bother me.


Hope this post provided some inspiration for your own outdoor space! It's already JULY, people! So go outside right now, sweep off your patio, and imagine yourself cozied up with friends, twinkle lights, and booze. Your next stop: thrift shop.

Happy 4th!


UA-46365231-1