Showing posts with label entertaining. Show all posts

Thursday, June 12, 2014

BACON GOAT CHEESE BITES

Hello, dear reader. And happy summer!

We had our first cookout a few weeks ago. The older I get, the more I love cooking out. In our circle of friends lately, we've been really into "bring your own meat" cookouts, which make for really easy prep. Plus they make hosting a large crowd a lot more manageable (especially on a grad student budget, which most of us are on).

My menu was extremely easy (and quick) to prepare, and everything on it keeps well as leftovers. Here's what I did:
     bruschetta
     quinoa salad
     big bowl of edamame
     bacon goat cheese bites (and a basket of crackers)
     cheesecake tartlets

Does anyone have any suggestions for refreshing hot-weather alcoholic drinks that are good for pitchers/large batches? For the party I made this white sangria, but it wasn't much of a hit. I let the fruit soak for 24 hours, and it was still pretty bland. Next time I'll opt for some bourbon iced tea or maybe a some kind of gin drink.

These adorable bite-sized cheese balls were my favorite. (And that's saying something, because I love bruschetta probably too much.) They were a huge hit, and I recommend them highly! They're easy to make and look VERY cute, and they're perfect for parties. This recipe stays at the front of my party book.

BACON GOAT CHEESE BITESadapted from this recipe

8 ounces goat cheese
8 ounces cream cheese, softened
2 tablespoons dried herbs (I used oregano, basil, and thyme)
3 cloves garlic, minced
1/2 teaspoon black pepper
large pinch salt
12 slices bacon, cooked till crispy
1/2 cup walnuts

*This recipe would be easily halved, but this amount disappeared quickly in a crowd.
**You can easily make these 2 - 3 days ahead. Just store in the fridge on parchment paper in an airtight container.

First cook the bacon. I like to bake mine on a foil-lined baking sheet - about 15 minutes at 400 degrees. Remove from oven when bacon is just crisp, and soak up the grease with a paper towel. Let cool.

Combine goat cheese and softened cream cheese and mix well. Stir in herbs, garlic, pepper, and salt. Put the mixture in the fridge.

Once bacon is cool, chop roughly. Place in a blender or food processor with walnuts, and process until minced. Pour into a bowl.

Remove cheese mixture from fridge. Use your hands to roll spoonfuls of the mixture into balls - about 3/4-inch wide. Roll balls in bacon mixture so they are well coated. Store in fridge until ready to serve.

Wednesday, February 26, 2014

STAMPED CLOTH NAPKINS (& DIY POTATO STAMPS)


Hi, dear reader!

I'm generally a very floral, flowy, nature kind of person (and our apartment is just like that), but I'm such a sucker for modern, minimalist design and geometric shapes. I have lots of little modern/geo decor ideas collected in the back of my mind, but I've had no way to realize them since our (small) apartment aesthetic is very vintage/rustic. I haven't figured out a way to incorporate the geometric themes I love with the homey, traditional style of our decor.


I was going to stamp up some pretty vintage looking napkins when I realized this was my chance to sneak in some shapes. Napkins!

Perfect.


It was one of those last-minute craft urges - you know, where you have an idea and you HAVE to make it right this very second? But I don't have any stamps. So I pulled out some potatoes, spent about 20 minutes carving, and voila! (Almost) free stamps for my new geometric napkins!


To make potato stamps:
  1. Cut a potato in half (width-wise). 
  2. Insert a cookie cutter about 3/8" into the potato (white part, not skin part), to cut the shape. 
  3. Use a knife and/or your fingers to remove the extra parts, using the cookie cutter cut as a guide.
I used "soft" fabric paint - Washable. Got it at Michael's - some matte and some metallic. 

While stamping, you may get some extra paint around the edges of your shape (squished out when you pressed down on the stamp). Use a Q-tip to dab the extra paint away and smooth out the line. 

After the napkins dried overnight, I washed them in the washing machine, and they came out perfectly well and very soft (not stiff from the paint). 

Happy crafting!

Monday, January 13, 2014

Perfect Ranch Cheesy Chex Mix


Hello, dear readers!

Are you a chex mix person? I've always associated it with the holidays, since my mom makes huge batches of baked garlic chex mix at Christmastime. It sits around in bowls which somehow refill themselves and makes the most perfectly cozy vacation snack.

Plus, chex mix makes a great gift. And not just during holiday time!

After filling up on the baked garlic stuff this holiday season, my mom and I had an urge to get some ranch action in for a next batch. I combed through many recipes for cheesy ranch chex mix, read many reviews, and created this one. I love it. Hope you enjoy it!


Perfect Cheesy Ranch Chex Mix

makes 11 cups

2 cups goldfish crackers (cheddar)
2 cups cheese-its (cheddar - parmesan duo)
2 cups oyster crackers
1 cup small pretzels (I like the square, lattice/grid shape the best)
2 cups corn chex
2 cups rice chex

1/4 cup butter, melted
1 pkg. (1 oz.) Ranch dip or dressing mix (I've used both - either is fine!)

Combine crackers, pretzels, and cereal in a large bowl. Pour about half of the melted butter over the mixture, then sprinkle about half of the Ranch mix. Stir to coat. Repeat with remaining butter and Ranch mix. Store in an airtight container for up to 2 weeks.

Makes a great gift or party snack!


Friday, January 10, 2014

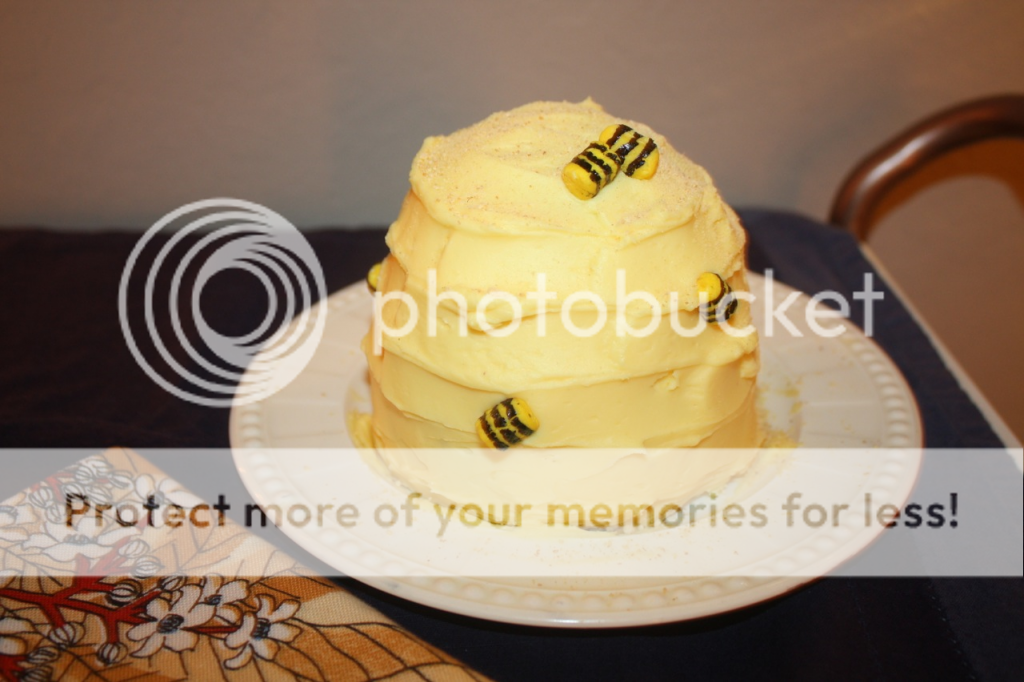
LITTLE BEE HIVE CAKE


Happy New Year, dear readers! I hope you've enjoyed a lovely holiday season.

I'm sorry I was away so long.

But I have a really cute cake to share with you.


For Nate's birthday, I'm all about the themed desserts.

Last year it was robots.


The year before that, it was video games. (If you haven't played the game Portal, I recommend it, and I don't play video games often.)


This year, it's bees. Yes, he loves bees. I mean, bees ARE awesome, aren't they? Our world would be a lot uglier and less delicious without them.

This would be so sweet for children's parties and birthdays. I have a friend who is thinking of using bees as a theme for her daughter's second birthday this month - how cute would that be? :)


BEE HIVE CAKE INSTRUCTIONS

This cake was for only two people (a quick, weeknight celebration kind of thing), so it's small. For this small cake, I used:
  • 4-inch round cake pan (mine is spring form, doesn't have to be)
  • 3-inch glass pyrex bowl
You can adjust the sizes according to what you have in your kitchen/how big your bee hive is going to be. I had all kinds of bowls and pans out, mixing and matching for a while until I found the right match. Just be sure your bowl is oven safe! 

I actually baked 4 pieces - 2 of the small round cakes, and 2 bowls - just to have a backup for each piece in case one didn't come out right or I made a mistake during assembly. Let the pieces cool thoroughly before assembling the cake. 

Assemble the cake just as you would a layer cake, with the bowl-shape cake upside down as the top layer. 
  1. Level and shape the cake. Use a serrated knife to trim up both pieces until you get the shape you want. 
  2. Put a thick layer of frosting in between the two pieces. 
  3. Apply a crumb coat
  4. Apply a very thick layer of icing (not perfect, just relatively even) all around the cake. Starting at the center of the top of the cake, use a small spatula or the back of a spoon to create a spiral all the way down the cake. Press just enough that the spiral is visible. (If you mess up, just smooth it out and start over!)
I prepared the full amount of cake batter for a regular cake recipe, poured what I needed into the small pans and the bowls, and made cupcakes out of the rest. I sprayed both the cake pan and bowl with cooking spray.

For the bees, I actually rolled and shaped pieces of yellow licorice from a mixed licorice candy bag that we had at home. I painted the black stripes on with black gel food coloring. You can use fondant, if you have those skills, or get creative with other kinds of candy. Anything small, yellow, and edible can get striped with a paintbrush and food coloring!

For the cake, I just doctored up a devil's food cake mix with an extra egg, some sour cream, and instant chocolate pudding mix. For the frosting I used this vanilla buttercream.

I sprinkled some graham cracker crumbs on top for a little added texture and color.


Enjoy, and have a wonderful weekend!


Wednesday, November 13, 2013

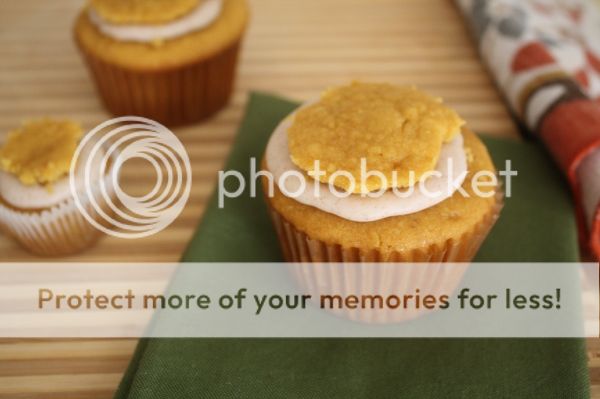
PUMPKIN CUPCAKES with MAPLE-CINNAMON CREAM CHEESE FROSTING


All right, dear readers. I'm not the biggest fan of pumpkin, but Jessica's pumpkin dream cake on The Novice Chef kind of made my mouth water, particularly the cream cheese frosting with maple syrup and cinnamon.


The cake is moist and dense, and it's really perfect with cream cheese frosting. However, if you're in it for the pumpkin, you should know the pumpkin flavor in these cakes is pretty faint. Just enough, and fantastic with the flavors in the frosting.


I'd planned to fill all of the cakes with the frosting (and not frost on top), but I got half way through the minis and stopped because the cake was a little too dense to fill by inserting a tip. So for the ones you see not frosted on top, I cut a conical chunk out of the top, filled it with frosting, and replaced the cone of cake.

As you can see, it looked pretty messy, so I ended up just frosting the rest.

Happy, fall, dear readers. Enjoy!


PUMPKIN CUPCAKES with MAPLE-CINNAMON CREAM CHEESE FROSTING

taken directly from Jessica's pumpkin dream cake over at The Novice Chef, except for the assembly/baking time

Cakes:
3 cups all-purpose flour
1 1/2 teaspoons baking soda
1/2 teaspoon salt
3/4 cup unsalted butter, softened
2 cups granulated sugar
3 large eggs
1 tablespoon vanilla extract
1 (15 oz) can pumpkin
1/4 cup vegetable oil
1 cup milk

Frosting:
12 oz (1 1/2 packages) cream cheese, softened
3/4 cup unsalted butter, softened
3 tablespoons pure maple syrup
2 teaspoons vanilla extract
2 teaspoons cinnamon
6 cups powdered sugar

In a medium bowl, mix flour, baking soda and salt. Set aside. In a large bowl/stand mixer, cream butter and sugar until light and fluffy. Beat in the eggs one at a time, then stir in vanilla, pumpkin and vegetable oil. Beat in the flour mixture alternately with the milk.

Bake at 300°F - standard for 18-20 minutes, mini for 12 - 14 minutes.

For the frosting: In a large bowl, cream butter and cream cheese until smooth. Beat in maple syrup, vanilla and cinnamon. Add confectioners' sugar and beat on low speed until combined, then on high until frosting is smooth.

Saturday, September 28, 2013

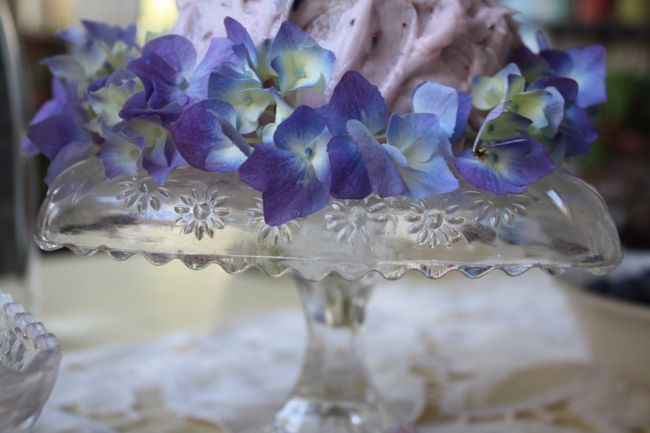
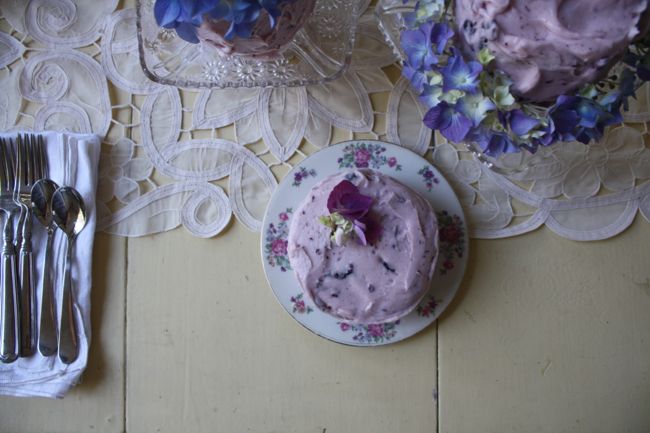
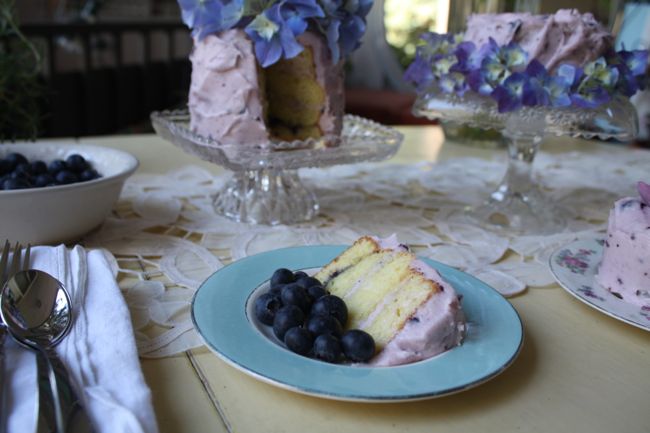
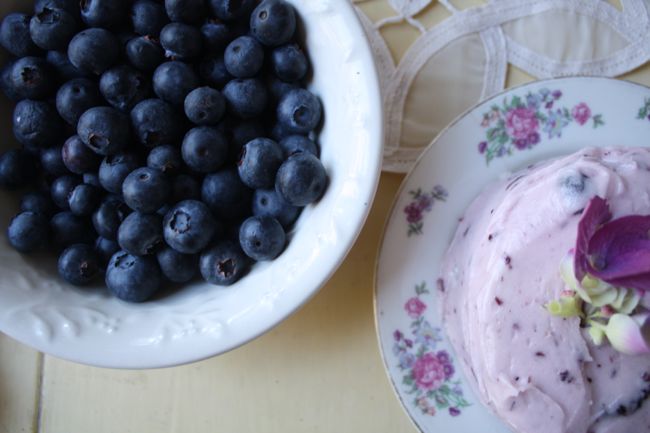
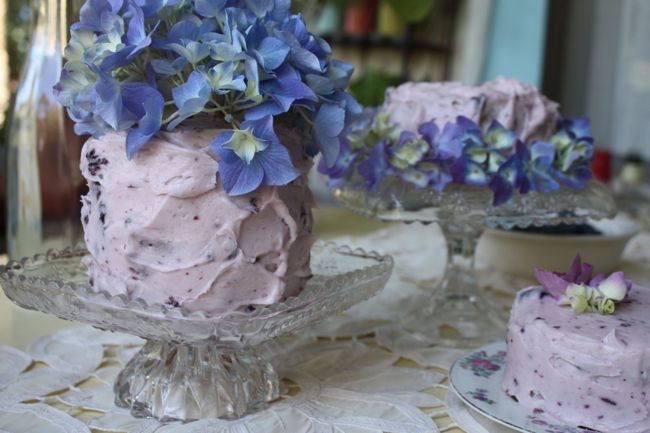
TINY ADORABLE HYDRANGEA CAKES


Photo Disclaimer: I tired a new way of compressing my images for this post, and sadly they didn't turn out well at all. Even sadder yet is that I forgot to copy the originals beforehand :( 
I'm sorry for the poor quality of the images... sad day!


I love hydrangeas. They're so bold and striking with their unreal blues and purples, yet there's something so old-fashioned and simple about them. I couldn't pass up these large, beautiful $5 bouquets at farmers' market and ended up with two big vases of them in the apartment. For the first few days, I couldn't help but imagine all kinds of dramatic uses for them. Some combination of my artistic urges and my sweet tooth resulted in these darling little cakes.

Now, beauty and drama aside, hydrangeas are toxic - do NOT eat them! I was pretty careful to have very few petals actually touching the cake. I placed wax paper underneath the large whole flower on top of the tall cake. Of course if I really wanted to be safe, I should have used silk flowers. But, yeah... no one was eating these cakes except my husband and me, and I was pretty sure we'd be okay being careful...


VANILLA CAKE: Nothing special here, just use your favorite recipe. I just doctored up a vanilla cake mix by adding one extra egg and a small package of instant pudding mix to the batter.

BLUEBERRY BUTTERCREAM

1/2 cup blueberries
1 cup butter, softened
3 - 4 cups powdered sugar
2 - 3 tablespoons heavy whipping cream

In a large bowl, mash blueberries with a fork. Add butter and beat well. Gradually add 3 cups sugar and beat until smooth. Stir in whipping cream to combine, then beat for one more minute.

LEMON BUTTERCREAM (for filling)

1 cup butter, softened
3 - 4 cups powdered sugar
1 tsp. vanilla extract
4 teaspoons lemon juice

Combine butter and 3 cups sugar until smooth. Add vanilla and lemon and stir until smooth. Taste, and add lemon juice by teaspoon if needed, to taste. Adjust powdered sugar for consistency.


Thursday, August 29, 2013

BLUEBERRY-VANILLA CAKE (w. lemon buttercream)

Hi, dear reader. Hope you're ready for SEPTEMBER. That's right. Summer flitted by as quickly as it does every year, and September is braced to help us let go by giving us some cooler nights and teasing us with pretty fall things to come. And most of us, I think, probably need those pretty things to comfort us during our good-byes to summer skin, late nights outside, and, especially, lots of sunshine hours.

I do love season changes. They're always bittersweet (yes, even winter to spring). Life transitions are the same. I'm starting grad school next week (yay!), and I couldn't be more ready. At the same time, I've so been missing the little munchkins I nannied this year. And believe it or not, I've even missed seeing their nursery school teachers, who were perfectly inspiring and loving, and who taught heaps to their toddlers and pre-school-aged children.

This cake was for them. Thanks, teachers, for doing one of the most important jobs in the world.


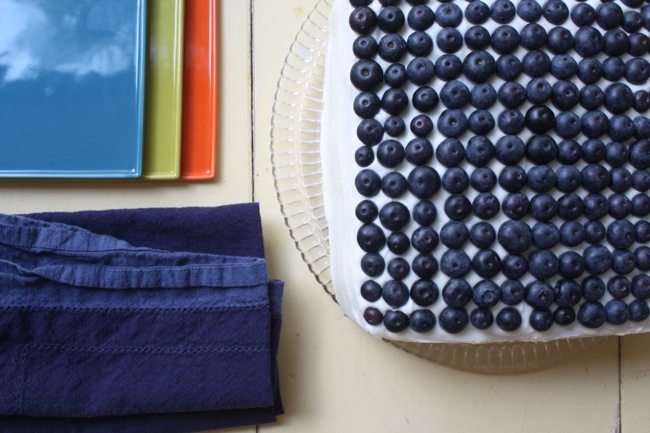
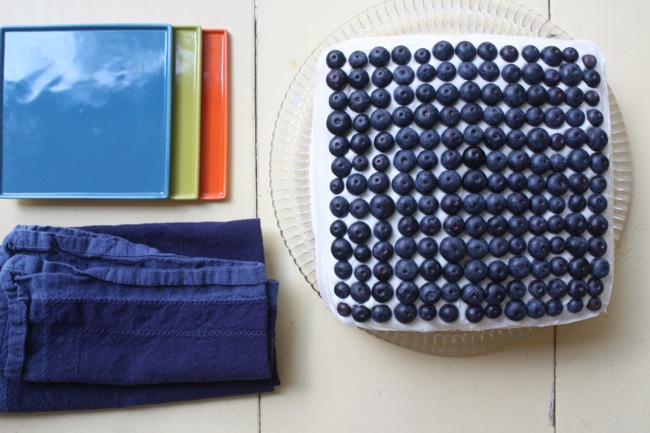
It's a vanilla cake with lemon buttercream, filled with a layer of blueberry buttercream. The cake is a little heavy in order to accommodate the heap of blueberry buttercream I wanted to fill it with :)

I do love how the "grid"of berries turned out. Cool, yeah? Actually, I thought that part would be super fun, and though the first few rows were fun, the subsequent tens of blueberries took a lot of patience...


BLUEBERRY BUTTERCREAM (for filling layer)

1/2 cup blueberries
1 cup butter, softened
3 - 4 cups powdered sugar
2 - 3 tablespoons heavy whipping cream

In a large bowl, mash blueberries with a fork. Add butter and beat well. Gradually add 3 cups sugar and beat until smooth. Stir in whipping cream to combine, then beat for one more minute.


LEMON BUTTERCREAM

1 cup butter, softened
3 - 4 cups powdered sugar
1 tsp. vanilla extract
4 teaspoons lemon juice

Combine butter and 3 cups sugar until smooth. Add vanilla and lemon and stir until smooth. Taste, and add lemon juice by teaspoon if needed, to taste. Adjust powdered sugar for consistency.


Monday, July 1, 2013

COZY SUMMER BALCONY (IN A RENTED APARTMENT)


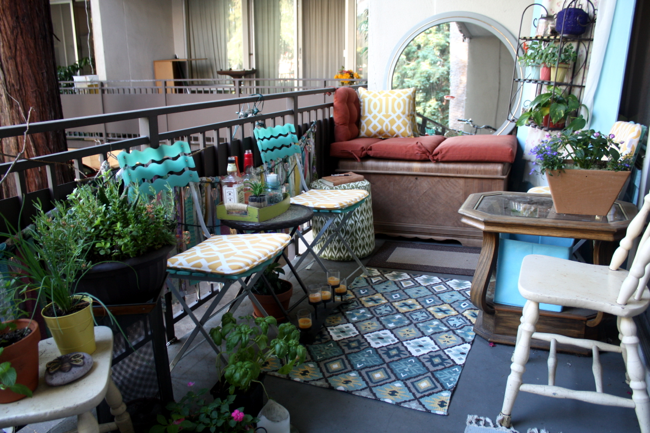
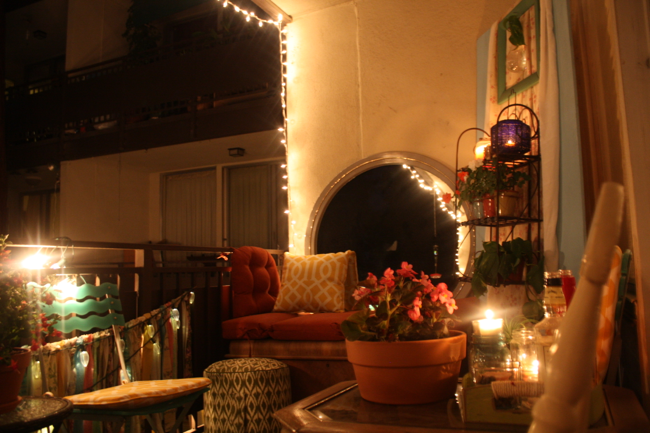
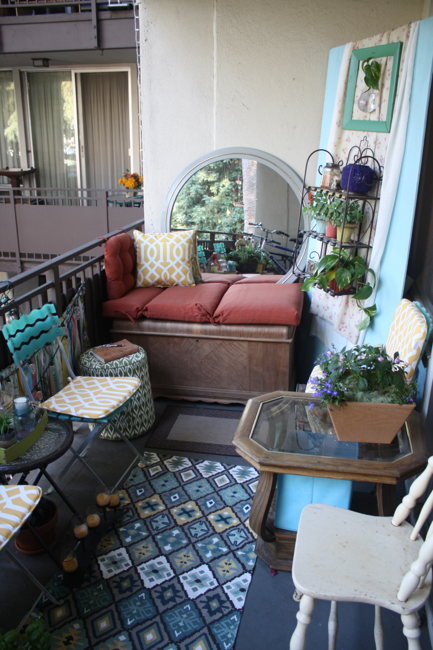
I've been working hard to "summer up" our balcony, and I'm happy to say that we're now enjoying a very lovely space! It's pretty (yay); it's practical (still using it for storage); and it's usable (you can get comfy out there - day or night; alone or with friends; reading, eating, sleeping, whatever). I'm really excited about the space, and I'm excited to share it with you! And to share ideas and tips for your own balcony/patio, so you can get out there on... those su-um-mer ni-hights.


Something's pretty enchanting about being with friends on warm-weather nights, especially if you've got twinkle lights and booze. When I lived in Illinois, I spent my summers at home (my mom's house), where I was absolutely spoiled by ideal settings for those enchanting kinds of summer nights: a beautiful patio, a fire pit, a big open pasture (we used to have horses). And we lived in the country so, of course, stars. Always stars.


Now my little SF bay area apartment definitely doesn't have a big open field or a fire pit, but we're so lucky to have a sizable balcony with plenty of trees to look at and lots of twinkle lights leftover from our wedding. Actually I may have gone a little overboard in the twinkle lights department... I think we're probably the Griswolds of our building. (But I love it. I love twinkle lights outdoors. A lot.)

Despite those advantages, there were some minor obstacles:
  • narrow space
  • small budget
  • renting, so can't put holes in the walls
  • don't have a green thumb, direct sunlight, or much time to spend caring for plants
  • still needed to use some space for storage (bikes, garden stuff, outdoor things etc.)

I DEALT WITH THE NARROW SPACE  by arranging the seating as circularly as possible, while offsetting the chairs so that no one is sitting directly across from someone else.

I also used a big mirror at one end of the patio to make the space seem bigger. The mirror is from an old dresser set, and simply leans agains the wall (so I didn't have to put holes in the wall).


Another must for small spaces is versatile furniture, e.g. chairs that can fold up and be moved, benches or footstools that have storage space inside, side tables with drawers. One of my favorite pieces of the balcony is this ottoman (from Target), which we use also as a pillow and a table.


AS FOR A SMALL BUDGET, I tried to work with what we had and buy as little as possible. I thrifted and made things by hand (check out my Pinterest for more inspiration). The biggest investment we made was in seat cushions, which was very much worth it (Bed, Bath, & Beyond). Besides making the space more comfortable, they of course add color and patterns. Mix and match. Not all seats have to have cushions. Another quick way to make the patio cozier is to add a rug. (Our balcony floor seems to be kind of yucky, no matter how much we clean it, so a rug made a huge difference for us. Try TJMaxx and HomeGoods for nice, inexpensive rugs.) Plus, a rug in the middle of a seating area gives the seating a central focus point and helps tie the area together.

Definitely check out thrift stores and flea markets for these things:
patio chairs and side tables
mirrors
lanterns, candle holders, other decor
flower pots and planters, plant stands
sheets/curtains/fabrics for making fabric garlands, outdoor curtains, or slipcovers

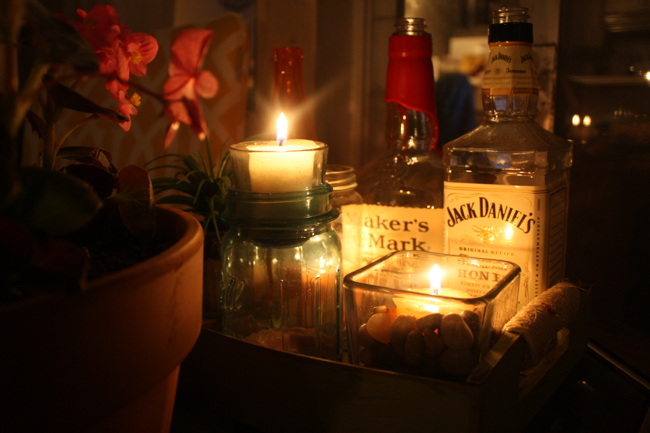
I also hit up the Dollar Store, just in case something jumped out at me. You never know what you'll find! I got these square glass candle holders and vase-filler pebbles to use as candle holders (see below).


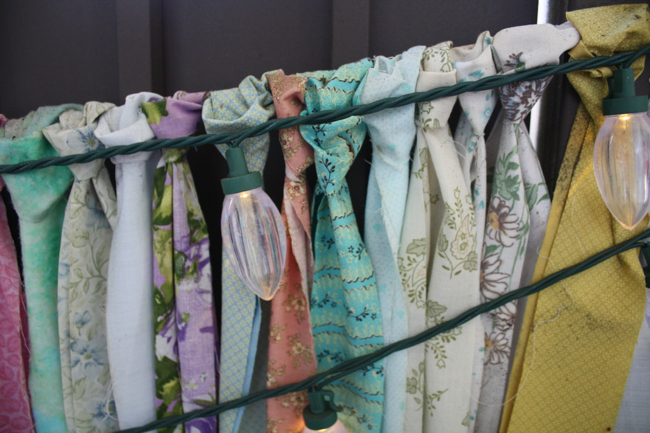
This fabric garland is made from strips of thrifted sheets, and it does a nice job covering the not-so-pretty metal railing. Of course it looks darling with large LED twinkle lights, too :)


OKAY, ON NOT PUTTING HOLES IN THE WALLS: I already mentioned the large mirror at one end of the patio, which has long legs attached to the back so it can lean against the wall and doesn't need to be hung. I also have this huge piece of plywood (8' x 3'), painted blue. (It used to have a mirror on it but I've now recycled it to something new.) I leaned that in the corner to use as a little patch of removable wall that CAN have holes in it. I hung fabric over the top as a kind of a "background," to make it feel a little more cozy. You can do this on the real wall, too: hanging fabric or a curtain directly on a wall requires minimal holes if you use small hooks and a wire. If you're worried about weather-proofing, try a shower curtain. 

Also, consider putting some holes in the ceiling. I know that's cheating a bit, but you can find tiny hooks (for lanterns, lights, etc.) that would only put a small hole in the ceiling. Plus, hanging from the ceiling adds depth. And after a couple of lanterns are up, you might not need anything on the wall at all. 


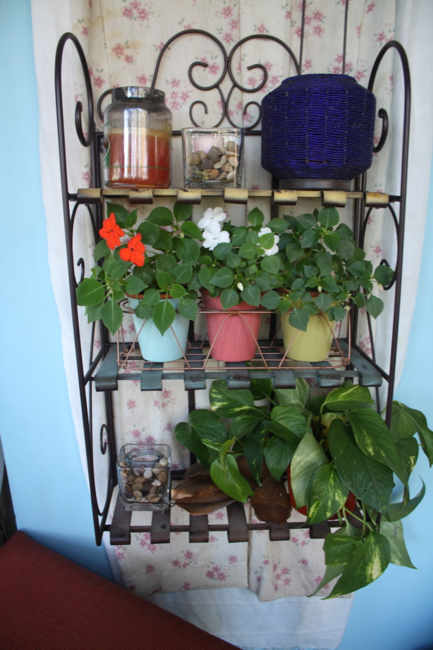
This little hanging starter vase came from CB2. Isn't it darling? The frame and fabrics were thrifted. 


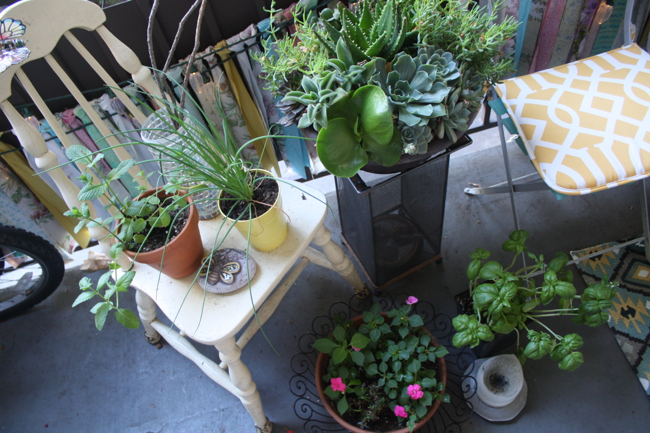
NOW, ABOUT PLANTS. Many of you may be blessed with a plenty of sunlight on your balcony, or even a green thumb, and I'm so happy for you! But plants are not my thing (though I'm trying!). If you're like me, with limited space, not too much time to spend caring for plants, and a mostly shaded balcony, don't fret. You have plenty of options! (I'll write a more detailed post for you soon with tips for balcony gardens :) ) For now, I'll say two things: succulents and herbs. Succulents are low maintenance, drought-tolerant, and really don't need full sun (though they like it). Many herbs will do well with part sun/part shade. Try using some rail planters to maximize sunlight and minimize the space they take up. (Make your own rail planters by drilling holes in plastic pots and attaching them with zip ties.)


USING THE SPACE FOR STORAGE works mostly because we have sectioned off the patio into two areas: seating and storage. We kept the small area to one side of the door for storage only (bikes, garden things, etc.), and the larger area on the other side of the door is for seating only. With our particular layout, the placement of the door helps section off the space, but some other ways to create sections are: keep walking space between the sections, use rugs to indicate sections, or arrange furniture in a way that clearly excludes the storage section.

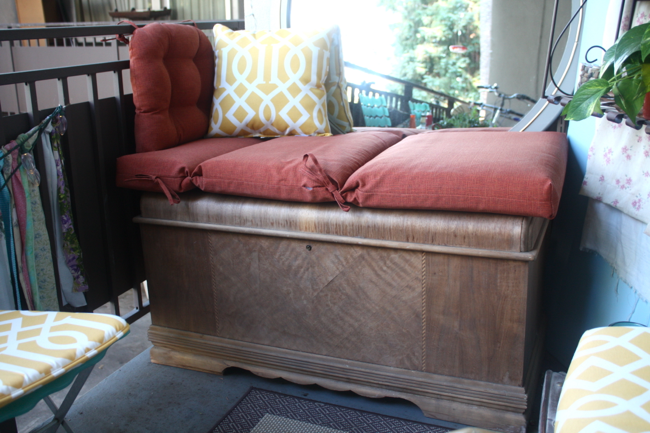
In addition to creating sections, we have furniture that doubles as storage space. My favorite is my "bench," made from seat cushions and a wooden chest. I know, the cushions look kind of funny like that. But, hey, the patio already has a somewhat eclectic, thrown-together feel, right? :) And since the cushions are so comfy, it doesn't bother me.


Hope this post provided some inspiration for your own outdoor space! It's already JULY, people! So go outside right now, sweep off your patio, and imagine yourself cozied up with friends, twinkle lights, and booze. Your next stop: thrift shop.

Happy 4th!


UA-46365231-1